
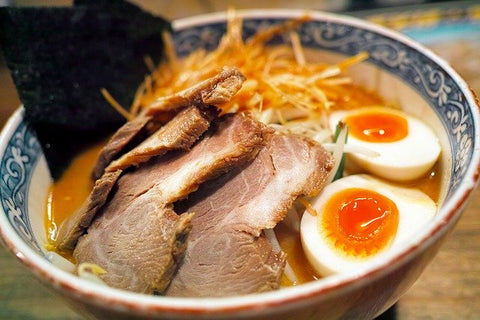
Imagine this: You take a bite of the umami-rich, melt-in-your-mouth, tender, marinated thin pork slices, and it's like heaven in your mouth.
The pork slices, also known as chashu, sit on top of a piping hot bowl of flavorful ramen, making your ramen experience one of a kind, just the way you like it!
If you haven’t checked out our blogpost on the different types of ramen toppings yet, check it out here!

Today, we’re going to take a look at how to make pork chashu in the comfort of your own home!
For those who do not eat pork for health or religious reasons,
Feel free to substitute pork meat for other types of meat such as chicken, duck or beef.
Have You Ever Heard of "Chashu"?
What Part of the Meat "Chashu" Is From?
Secrets to Making Authentic Chashu
Little Known Smart Tips to Make Impossibly Tasty and Very Juicy Chashu

Have You Ever Heard of "Chashu"?
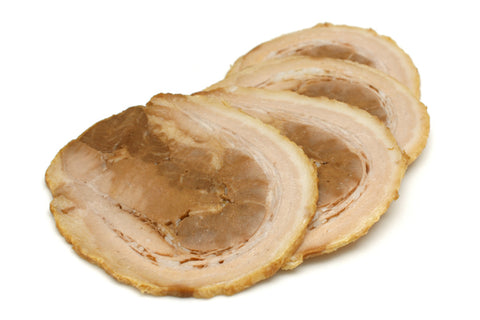
Chashu is a thinly-sliced piece of braised pork.
The origin of the word “chashu" (叉燒) is actually Chinese and it literally means, fork-roasted (pork).
However, the Japanese meaning of the word refers to braised pork in general.
Unlike its Chinese counterpart which features a firm piece of pork with a distinct and smoky grilled flavour,
The Japanese take on chashu is more tender and juicy.
Have You Ever Wondered What Part of the Meat "Chashu" Is From?
The location of the pork plays a vital role in the taste of the chashu.

Pork Belly (豚バラ / Butabara): Pork belly chashu is the best for people who enjoy the fatty taste of pork.
—————

Pork Loin (ロース / Rosu): Pork loin chashu is the lean part of the pork.
This is a great option for the health-conscious or for people who don’t like the oily taste of fatty meats.
—————
Pork Shoulder (肩ロース / Katarosu): A good combination of both the fatty part of the chashu and red meat is the pork shoulder.

Secrets to Making Authentic Chashu
 Ingredients:
 Ingredients:
- Pork belly 700g
- Vinegar 30cc/mL (or 1fl oz) - optional
- Soy sauce 200cc/mL (or 6.7fl oz)
- Sake 200cc/mL (or 6.7fl oz)
- Sugar 1 spoon (Brown sugar can be used as a substitute)
- Ginger 4 slices
- Garlic 2 cloves
- Japanese green onion (green part only) 1
- Other: Thick thread or twine
Directions:
(A) Tie the pork belly
There are 3 main reasons why the pork should be tied up:
- It can be heated evenly
- The pork retains its nice and round shape
- Stays intact while boiling instead of breaking
How to Tie Pork for Marination: Easy version (5-Step Process with Pictures):
1. Roll the pork into a round log-shape piece.
The pork piece should be oriented so that the fatty side (rind side) is facing outside.
Cut off any excess parts of the pork so that it is flat and neat.
2. Place a piece of thick cooking thread or twine onto the roll centred horizontally (as seen in the picture).
3. From the end of the roll, start tightly wrapping the thread around the roll of pork working your way back to the starting point.
Keep a distance of about 1cm between each wrap.
4. Continue tightly wrapping until you reach the starting point.
5. Once you’ve reached the starting point, tie both ends together.
How to Tie Pork for Marination: Difficult version (10-Step Process with Pictures):
1. Roll the pork into a round log-shape piece.
The pork piece should be oriented so that the fatty side (rind side) is facing outside.
Cut off any excess parts of the pork so that it is flat and neat. 2. Wrap your thick cooking thread or twine on one end of the pork roll and secure with a double knot.
This will be the first wrap. 3. Start your second wrap around the roll.
Pay attention to keeping the thread tight, or all that handwork will be wasted! 4. This is the tricky part! To finish off the second wrap, take the end of your thread.
And thread it through the middle of the first wrap.  5. Continue this process while keeping a 1cm distance between each wrap
 6. Continue wrapping (tightly), working your way to the opposite end.
You can do it! That chashu is calling your name! 7. Once you’ve reached the end of the pork roll, flip it over.
 8. Starting from the side you ended on, thread your twine through each wrap as shown in the picture. Pull tightly.
  9. Continue doing so until you’re back at the starting point.
(Not sure if you are doing it correctly? Skip to the next step to see what the finished product should look like!) 10. Once you’ve reached the starting point, tie loose ends together in a double knot to secure it in place.
Completed Bound Pork Roll (Front and Backside):


(B) Boil meat
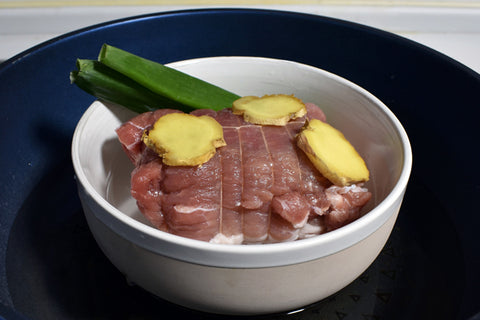
Prepare a large pot of water, just enough so that the pork can be fully immersed and carefully place in the pork that you’ve just artistically wrapped!
Start heating up your pork roll in water using high heat and bring to a boil.
After it reaches boiling, turn the heat down to low (light bubbling)
After removing the froth from the surface, combine vinegar, Japanese green onion, garlic and slices of ginger into the pot and and keep it boiling in this state for 2.5 hours.
The key point here is not to cover the boiling pot as the temperature will get too high.
Maintaining a consistent 95C (203F) is optimal for the best juicy chashu.

While you’re waiting 2.5 hours for the chashu to soak in all the flavour, let’s take a look at why we took the steps that we just did!
This will help you understand the cooking process better.

Why do we use garlic, ginger and only the green part of a Japanese green onion?
The compounds found in these ingredients actually contain a chemical that help break down unpleasant odors, a perfect and natural way to get rid of the pork smell.
Only the green part of the Japanese green onion is used as Japanese people usually don’t like the white part and it melts while being boiled.

Why do we boil the pork for such long period of time?
Boiling meat gradually hardens it and gives it a nice firm chew, as it slowly starts to cook.
However, for the purpose of making chashu, we want the pork to remain nice and tender.
Boiling it for more than 2 hours, allows the meat to get melt-in-your mouth soft.

Pan-fry vs. No Pan-fry
Some Japanese say that during the chashu-making process, it is better to pan fry the surface of the raw pork before boiling it.
They claim that this will shut in the moisture, oil and umami flavour.

However, from my personal experience and learning from my mother, I find that not frying the surface actually yields a better outcome.
After frying, the piece of meat has a stronger pork smell and the texture of the meat becomes harder than the chashu that was not initially pan-fried.
One theory for this result is that the white foam skim that floats onto the top of the boiling chashu mixture cannot come out if the pork has been previously fried as the surface is blocked.
I find that chashu that has not been previously treated by pan-frying, comes out softer and juicier.
Curious as to what the result for each one is?
Why not try both ways and see which one you like better.

Why is vinegar used in the initial boiling process and not other common ingredients like mirin or soy sauce, even though they are more commonly used than vinegar?
The acidic nature of vinegar helps break down meat fibres making it soft and porous.
Adding mirin hardens the meat and adding soy sauce dries out the meat.
Inconsistent to what we are trying to achieve - tender and moist chashu.
(C) Make the sauce
1. Combine the shoyu, sake and sugar in a shallow sauce pan and heat up in medium heat.


2. Put boiled chashu into the mixture to give it a nice dark colour
3. Move the chashu around to ensure that colour and flavour is evenly distributed
4. After it boils, turn off the heat but do not remove the chashu just yet
5. Allow the sauce to cool down, which will take about 30 minutes. (The savoury flavour is most effectively transferred over to the meat when the sauce is cooled)

(D) Refrigerate
Leave the sauce-soaked chashu in a leak-proof plastic bag in the fridge overnight. While refrigerated, chashu is good for approximately 7 days.

(E) Cut up chashu
Finally, get rid of the thread and carefully slice into thin slices while the meat is still cold. It is easier to slice up cold meat than hot.
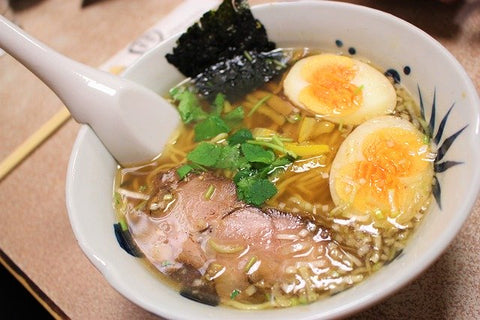
Put chashu on top of a bed of piping hot ramen noodles and serve!

(F) Use Cooking Torch (optional)
Want to bring out the flavour and aroma even more?
Use a cooking torch to add a smoky depth to your chashu!
Now that you’ve completed this tedious but rewarding recipe, give yourselves a pat on the back for mastering a new culinary skill!
This tender and savoury chashu is simply the cherry on top of a nice bowl of ramen.

Little Known Smart Tips to Make Impossibly Tasty and Very Juicy Chashu
These tips have been accumulated throughout the years from mistakes I've made while making chashu.

1. Use different pork meat parts depending on how tender you want your chashu to be
The tenderness goes like this...
Pork belly (most tender) > pork shoulder > pork loin (least tender) 
Red meat that doesn't have a lot of fat tend to be more tough.
So, if you want a juicy and soft chashu, pick meat that has some fat.

2. Let the meat absorb the flavour of the marinade quickly and effectively by putting it into a fridge
The quickest way for the marinade to soak into your chashu is while it is cooling down.

3. Parboil pork to make it tender
The key point here is not to cover the boiling pot as the temperature will get too high.
Maintaining a consistent 95C (203F) is optimal for the best and juiciest chashu.

4. Tie the pork
There are 3 main reasons why the pork should be tied up:Heat can be evenly distributed
You roll and tie the pork in a circular shape, so it stays nice and round
Stays intact while boiling instead of breaking off into chunks
3 Secret Facts About Chashu Chefs Will Not Tell You About

1. Japanese chashu’s origin came from China
The origin of the word “chashu" is actually Chinese and it literally means, fork-roasted (pork).However, the Japanese meaning of the word refers to braised pork in general.
In ramen restaurants of Japan, it is rare to find an oven to roast pork, so the Japanese counterpart of “chashu” is boiled in a pot instead.
The root of this confusion most likely stemmed from popular culture.
In the west, “chashu” is more widely known as the braised and boiled one found on your Japanese ramen, obscuring the original root and preparation method of this Chinese word.

2. You need to tie the pork up with cooking twine or thread before cooking chashu.
The parts of pork that are used for chashu are pork belly or pork shoulder.
These parts of the meat contain red meat and fat, which tend to separate when cooked.
In order to prevent this, you need to tie the pork.
With this method, you can lock up the flavour and moisture inside the chashu so it becomes tender and juicy once cooked.

3. You can use chashu in other dishes (not just ramen)
Chashu is known as a one of the most famous ramen toppings, but you can use it for a variety of other dishes.
For example, you can use chashu in fried rice.
You can dice the chashu and put it with your fried rice!
You can also use chashu for chashu-don, salad, and sandwiches.

Chashu Variations No One Will Ever Want to Share
Ingredients:
- Chicken leg meat OR Pork ham meat 500g
- Ginger 3 slices
- Garlic 2 cloves
- Japanese green onion (green part only) 1
- Other: Thick thread or twine
- Soy sauce 200cc/mL (or 6.7fl oz)
- Sake 250cc/mL (or 8.5fl oz)
- Sugar 1 spoon (Brown sugar can be used as a substitute)
Directions:
- First tie the piece of meat. (Scroll to the bottom for the step-by-step process to tie the meat for chashu)
- Take one tablespoon of salt and rub it evenly over the surface of the meat and leave it in the fridge for 20 minutes
- Steam the meat with ginger, negi, garlic and 50mL of sake in a boiling pot of water. To check whether the meat is cooked throughly, poke a fork into the meat. The meat juice that comes out should be transparent and not red. Approximate cooking times: Chicken - 30mins / Pork - 40mins

- While we are waiting for the meat to cook, make the sauce. Combine 200mL of soy sauce, 200mL of sake and 1 spoon of sugar in a shallow sauce pan and heat up in medium heat. Turn off the heat once the mixture reaches boiling.
- Once the meat is completely cooked, soak the meat into completely cooled homemade marinade and leave it in the fridge overnight.


How to Tie the Meat (Step-by-Step)
Easy (4-Step Process with Pictures)
- Place a piece of thick cooking thread or twine onto the roll centred horizontally (as seen in the picture).

- From the end of the roll, start tightly wrapping the thread around the roll of pork working your way back to the starting point. Keep a distance of about 1cm between each wrap.

- Continue tightly wrapping until you reach the starting point.

- Once you’ve reached the starting point, tie both ends together.

Difficult (10-Step Process with Pictures)
- Wrap your thick cooking thread or twine on one end of the pork roll and secure with a double knot. This will be the first wrap.

- Start your second wrap around the roll. Pay attention to keeping the thread tight, or all that handwork will be wasted!


- This is the tricky part! To finish off the second wrap, take the end of your thread, and thread it through the middle of the first wrap.

- Continue this process while keeping a 1cm distance between each wrap

- Continue wrapping (tightly), working your way to the opposite end.

- Once you’ve reached the end of the pork roll, flip it over.

- Starting from the side you ended on, thread your twine through each wrap as shown in the picture. Pull tightly.


- Continue doing so until you’re back at the starting point. (Not sure if you are doing it correctly? Skip to the end to see what the finished product should look like!)

- Once you’ve reached the starting point, tie loose ends together in a double knot to secure it in place.

- If you've tied it correctly, the chashu should look like this!


If ramen or any other types of Japanese style noodles and soup is comfort food for you, you might be thinking that you need ramen bowls.
Ramen bowls are perfect for a large bowl of ramen.
They are big enough to pile on the fixings, they are durable, and best of all, they look beautiful.
Share a bowl of warm, hearty home cooked ramen with your family, friends and loved ones for your ramen night.
Or when you order take out, transfer the noodles from those awful looking containers.
You and your family will be so excited and can’t wait until your next ramen night to use these bowls!
About the Author

"I am from Ibaraki, Japan.
Ramen is great! It can bring you a sense of happiness and satisfaction that no other food can. I have been eating ramen for 30 years.
If there is no ramen, my life would be miserable.
Ten years ago, I worked as an office worker. The job was really stressful - excessive working hours, low wages, unpaid overtime work, and constantly being yelled at by my boss.
I was new and alone, no girlfriend, no friends, and felt very lonely.
My only oasis was the ramen shop near the office. For me, the ramen chef there was literally an angel. I saw a halo on his head. (No joke)
Tonkotsu shoyu ramen was my all-time favorite. He made ramen with broth chock-full of umami flavor, nice chewy handmade noodles, and tender chashu.
My greatest dream is connect people with ramen through my blog. I want to share a lot of interesting and funny stories and ramen trivia with you.
Knowing more about ramen can help you appreciate your ramen and make it taste extra delicious."


That’s a good tip! Thank you for commenting and sharing, Alli.
I’m going to be making chasu for the first time to go on top of my first batch of homemade ramen, and your recipe is in the running for the recipe of choice, but your “difficult” technique for tying the meat caught my attention. The faster way to do that exact tying is make the first loop with a knot, then loop the twine so that the running end gets caught inside the loop, fit that around the meat at the spot it’s needed and tighten it, then repeat all the way to the end. Then cut the twine a little longer than your piece of meat and do the underside like you did. The biggest benefit to the loop method is that you don’t need to estimate the needed length of the twine, since you only need to cut it when you secure the underside.
Hi Eve,
Thanks for leaving me a feedback! I’m glad you were able to learn something new from my article. Let me know how it turns out!
I feel so happy to have finally learned the cool and tricky way of tying it! Just have to cook it, now!
Hi Andrea,
Thank you for reading my article! I’m so glad to hear that you found it helpful. Ramen is also one of my favourite dishes – let me know if you try out the chashu recipe!
Leave a comment